Settings for ticket categories
When you create an event with Ticketing, you can select different settings for each ticket category. We present the options in detail here.
Overview:
Edit category settings
Edit categories when creating
If you create an event with ticketing, you can make the settings for the individual categories directly.
To do this, click on "Options" for the respective category.
You can also edit the category settings after creating the event.

Edit categories after entering the event
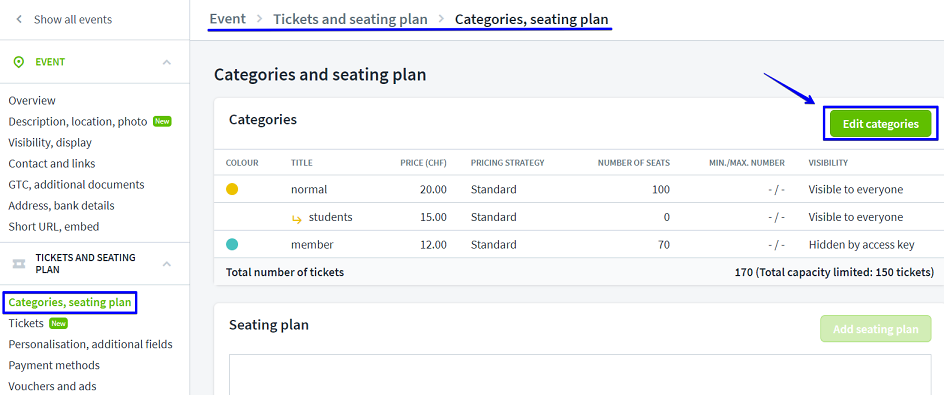
If you would like to edit the categories of your event, select the desired event and go to "Categories, seating plan".
Click on "Edit categories" here. You can now edit the individual categories by clicking on "Options".
Setting options for the categories
You can set the following points more precisely for each category:
- Price
- Sales limit
- Visibility
- Display
- Combination categories
- Checkpoints
- Codes
Price strategy settings
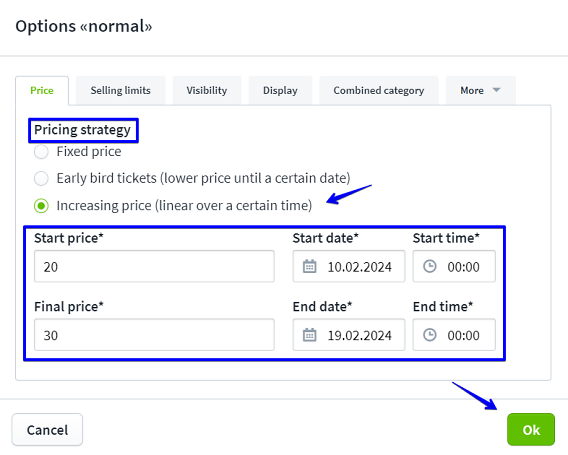
In the "Price" tab, you can define a pricing strategy for each category.
You can enter a fixed price "Fixed price" that does not change.
With "early bird tickets" you can set a kind of "early bird discount". This means that tickets can be purchased at a lower price up to a certain date. You can find out more about "early bird tickets" here >
Under "Increasing price", you can specify that the ticket price should increase steadily. You enter the start price and the start time. From this date, the price increases until the end price and time entered.
Sales limit settings
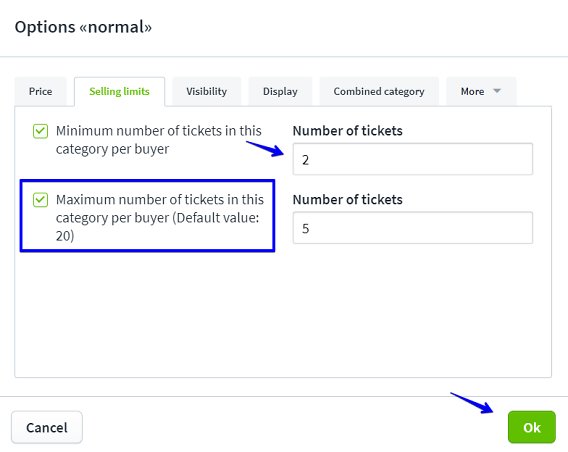
Under «Sales Limits», you can set whether a minimum or maximum number of tickets per buyer should apply in a given category. If no maximum is specified, the default limit is 20 tickets per buyer.
To do this, tick the box next to the desired restriction and enter the number under "Number of tickets".
Important: If the sales limits in a sub-category are to differ from the settings in the main category, these values must be adjusted separately in the sub-category. Changes in the main category are automatically transferred to the subcategories if they are not adjusted.
Visibility settings
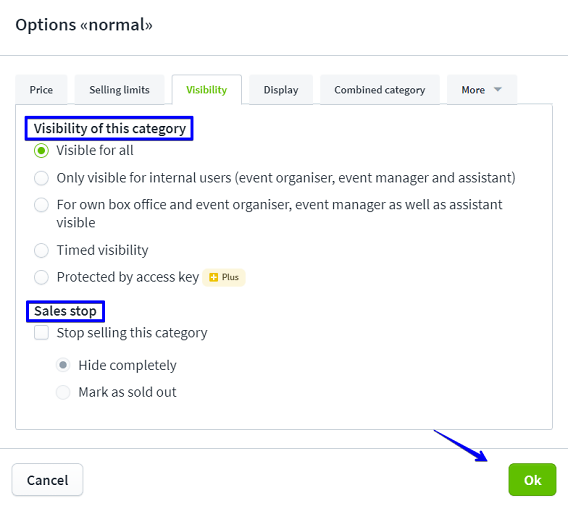
Under "Visibility" you can set who can see this category, or whether the visibility is time-controlled or you need a specific access key to be able to access the category.
You can find out everything about the visibility of categories here >
You can read more about the visibility of entire events here >
You can also set the "Stop sale" for this category here. If you select "Stop sale of this category", you can determine whether the category should be completely hidden or whether it should be labelled "Sold out".
Display settings
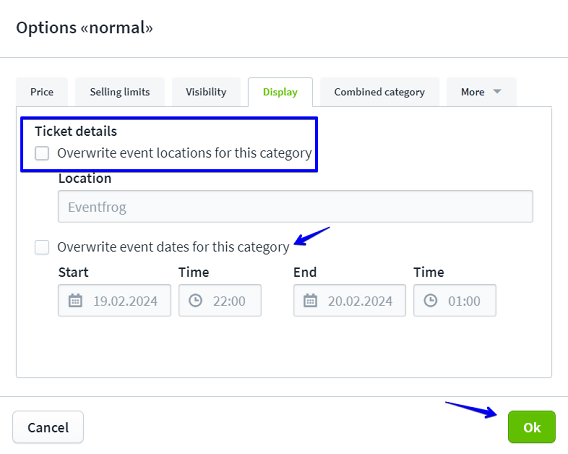
Under "Display" you can change how this category is displayed on the ticket.
This means that you can enter a different location and/or a different start and end time for the desired category.
The details on the ticket will then be overwritten for this category.
Combination category settings
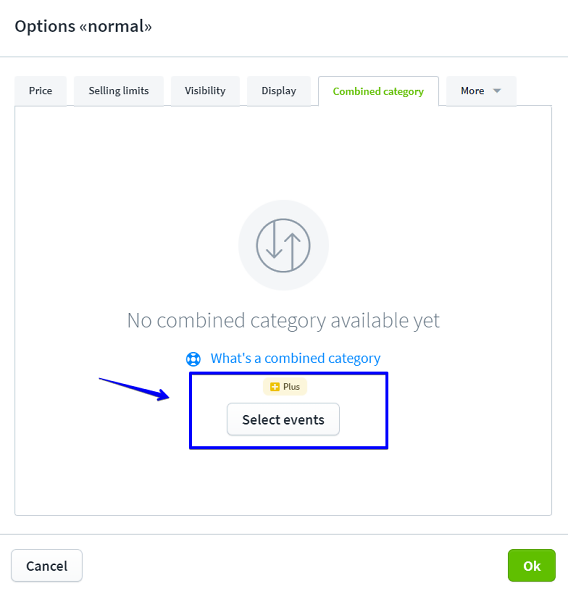
With the help of "combined categories", you can link the desired category with ticket categories of other events and thus combine ticket sales.
This means that when ticket buyers purchase tickets in this category, they will also receive tickets in the combined category.
Note: This setting falls under the Plus model. Only categories of events in the Plus or Pro model can be linked. You can only set combined categories if the events are created without a seating plan.
You can find out more about combined categories here: Combi categories: Tickets for various events or as multi-day passes >
Checkpoint settings
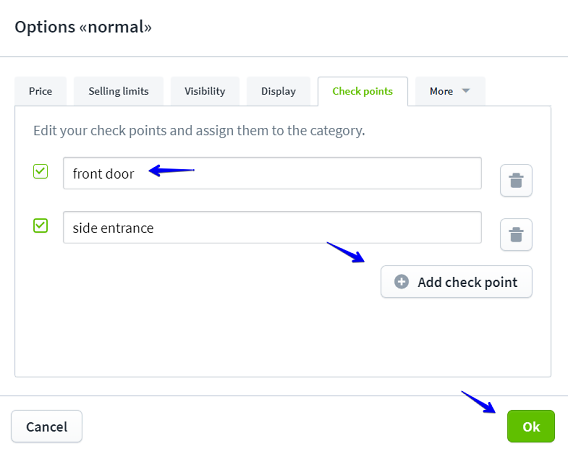
Control points are used to allocate different entrances to different ticket categories.
For example, you can create a special VIP entrance or give each category its own entry point.
Note: This function is part of the Plus package.
To do this, click on "Add control point".
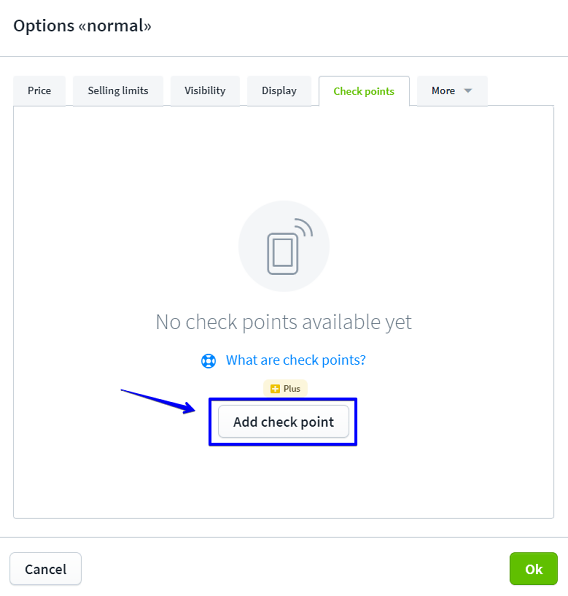
Now tick the box and name the checkpoint.
You can also assign several control points to a category by adding them.
Confirm the assignment by clicking on "Save".
You can find out more about checkpoints here: What are checkpoints, and how do I create them?
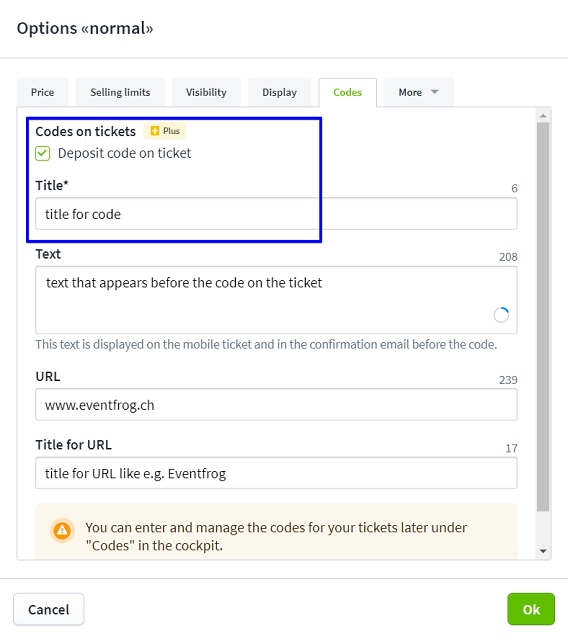
Settings Codes
You can enter codes for tickets and categories here or under "Codes" in the main navigation on the left.
Tick the box "Store codes on tickets".
Now you can give the codes a title that will also appear on the tickets. You can also enter a text, a URL and a title for the URL. Confirm your entry by clicking on "Save".
You can save the codes later.
Note: The "Codes on tickets" function falls under the Plus model. You can find out more about this function here >
